Lost wax casting is a great process for jewelry because it captures every detail in your model (even fingerprints, if you're not careful). What's not so great is having to carve those details every single time if you want to make several copies of an object. To get around this, we can make a reusable mold and cast duplicate wax models to destroy instead instead of our nice master model.

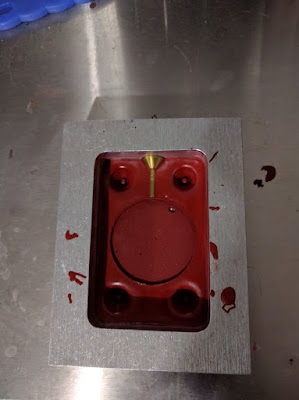
Since I already made the base, I can skip pouring the bottom half and just slide it into the mold frame from the under side.
If you need to make the base, you can follow the rest of this process to pour silicone in the bottom, then drop in the master and align it with the sprue (brass rod). There are four divots around the model. These make sure the two halves of the mold come together correctly so the wax model is aligned. To make these, I use the same brass cones that are used for the gates and drop them into the silicone after it has set slightly.
 The model is popped into the base, then is sprayed with Universal Mold Release, allowed to dry for five minutes, and topped with Easy Release 200
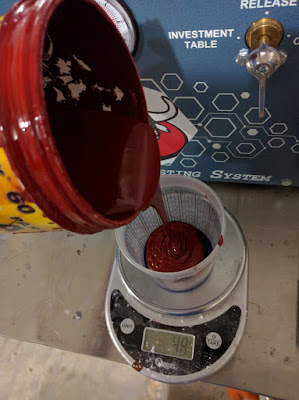
 At this point, it is time to mix the silicone. Mold Max 60 uses a ratio of 100:3 part A to B, by weight. Toss the mixing cup on the small scale and tare it out. Then dispense 3 grams into the cup using the pipette. Remember, it stains everything blue.
 Next, transfer the mixing cup to the large scale, tare it out, and pour 100 grams of part A in.
 Once the parts are together, stir until you can't see anymore blue, then stick it on the vacuum table. Under the dome, it will go through three phases as the vacuum rises to 28mmHg.
After waiting, use pliers to twist the brass rod, releasing it from the silicone, then pull it out. Push the mold out of the frame, and peel it apart.


Making the mold
Wax molds are typically made out of some form of elastomer. Vulcanized rubber is a standard material for jewelry because of the durability of the mold. However, it also requires an expensive vulcanizer, and you may not need all the qualities of vulcanized rubber.
Instead of rubber, I use Mold Max 60, which is a RTV silicone. This means it can vulcanize (cure) into a usable mold at room temperature instead of needing a machine. Mold Max 60 specifically is capable of handling high temperatures, so while it's not the necessarily the best option for wax molds, I can also use it for pewter. This way, I only have to keep one kind of silicone on hand.
Materials
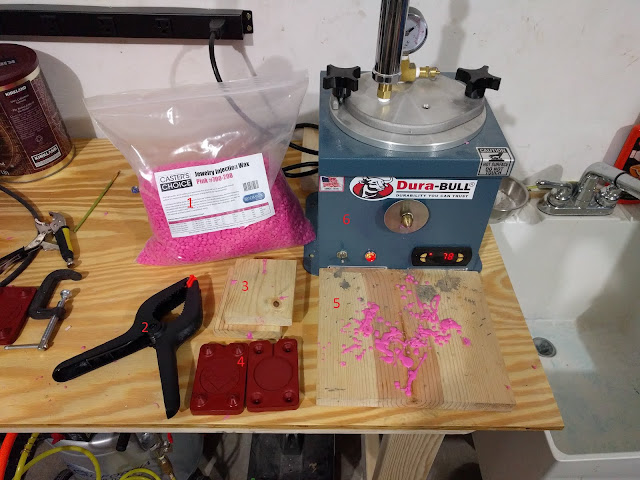
Going roughly left to right, there are 8 groups of things we'll be using for this process:
- Mold Max 60. As mentioned, this is the RTV silicone that the actual mold will be made of. There is a small disposable pipette at the base for dispensing the part B, since it stains everything blue.
- Mixing cup and a plastic spatula.
- Smooth-On Easy Release 200. This is sprayed onto the mold between layers to release the two silicone halves from each other.
- Smooth-On Universal Mold Release. This is sprayed onto the master object to help it release from the silicone. While you can do without this, skipping it makes it more likely that fine details will become muddled when removing the master model at the end. The two different sprays are actually accomplishing different things.
- These things help shape the silicone into the final mold. For the medallion project, I have one mold bottom I use for all the models to both save material and time. Since all the medallions are the same size, I can pop the master into the mold and work from there. Underneath it all is an aluminum mold frame from Rio Grande and a piece of acrylic to keep the silicone in when pouring the bottom and support the mold when pouring the top. Finally, there's a brass rod and cone to form the injection gate and sprue for the wax.
- A large gram scale, used for measuring out 100 grams of part A silicone.
- A fine detail scale, used for measuring out 3 grams of part B silicone. Yes, the fine detail is necessary. The first time I tried using only the large scale, and I wound up with closer to 10 grams of part B, causing the silicone to cure in a few minutes while under vacuum, rather than in the normal 40 minute pot life of the silicone.
- Vacuum machine. If you use one of the other mold silicones with a lower viscosity, you can do without this. Fun fact, if your phone gets wet, you can chuck it in here to dry it out. It pulls a little over a 28 mmHg vacuum, which will cause water to boil at room temperature.
Process
First, we want to set up the material base. The brass rod slips into the cone, and the whole unit slides into a hole on the mold frame.


If you need to make the base, you can follow the rest of this process to pour silicone in the bottom, then drop in the master and align it with the sprue (brass rod). There are four divots around the model. These make sure the two halves of the mold come together correctly so the wax model is aligned. To make these, I use the same brass cones that are used for the gates and drop them into the silicone after it has set slightly.


 |
| Low pressure. Looks the same. |
 |
| About 25 mmHg. The whole mixture rises as bubbles expand throughout the mixture. |
 |
| At 28 mmHg, the majority of the bubbles pop and the mix falls to the bottom of the cup. Continue vacuuming for another minute. |
After the extra minute of vacuuming is complete, release the vacuum, turn off the machine, remove the cup, and pour over the prepared mold.


Once the silicone is all in the mold, transfer the whole thing back into the machine, and turn the vacuum on to suck any bubbles that may have gotten mixed in while scraping the cup or are trapped in the model's details.

After vacuuming for another minute, remove the mold and let it sit for the recommended curing time. In this case, 24 hours.
After waiting, use pliers to twist the brass rod, releasing it from the silicone, then pull it out. Push the mold out of the frame, and peel it apart.

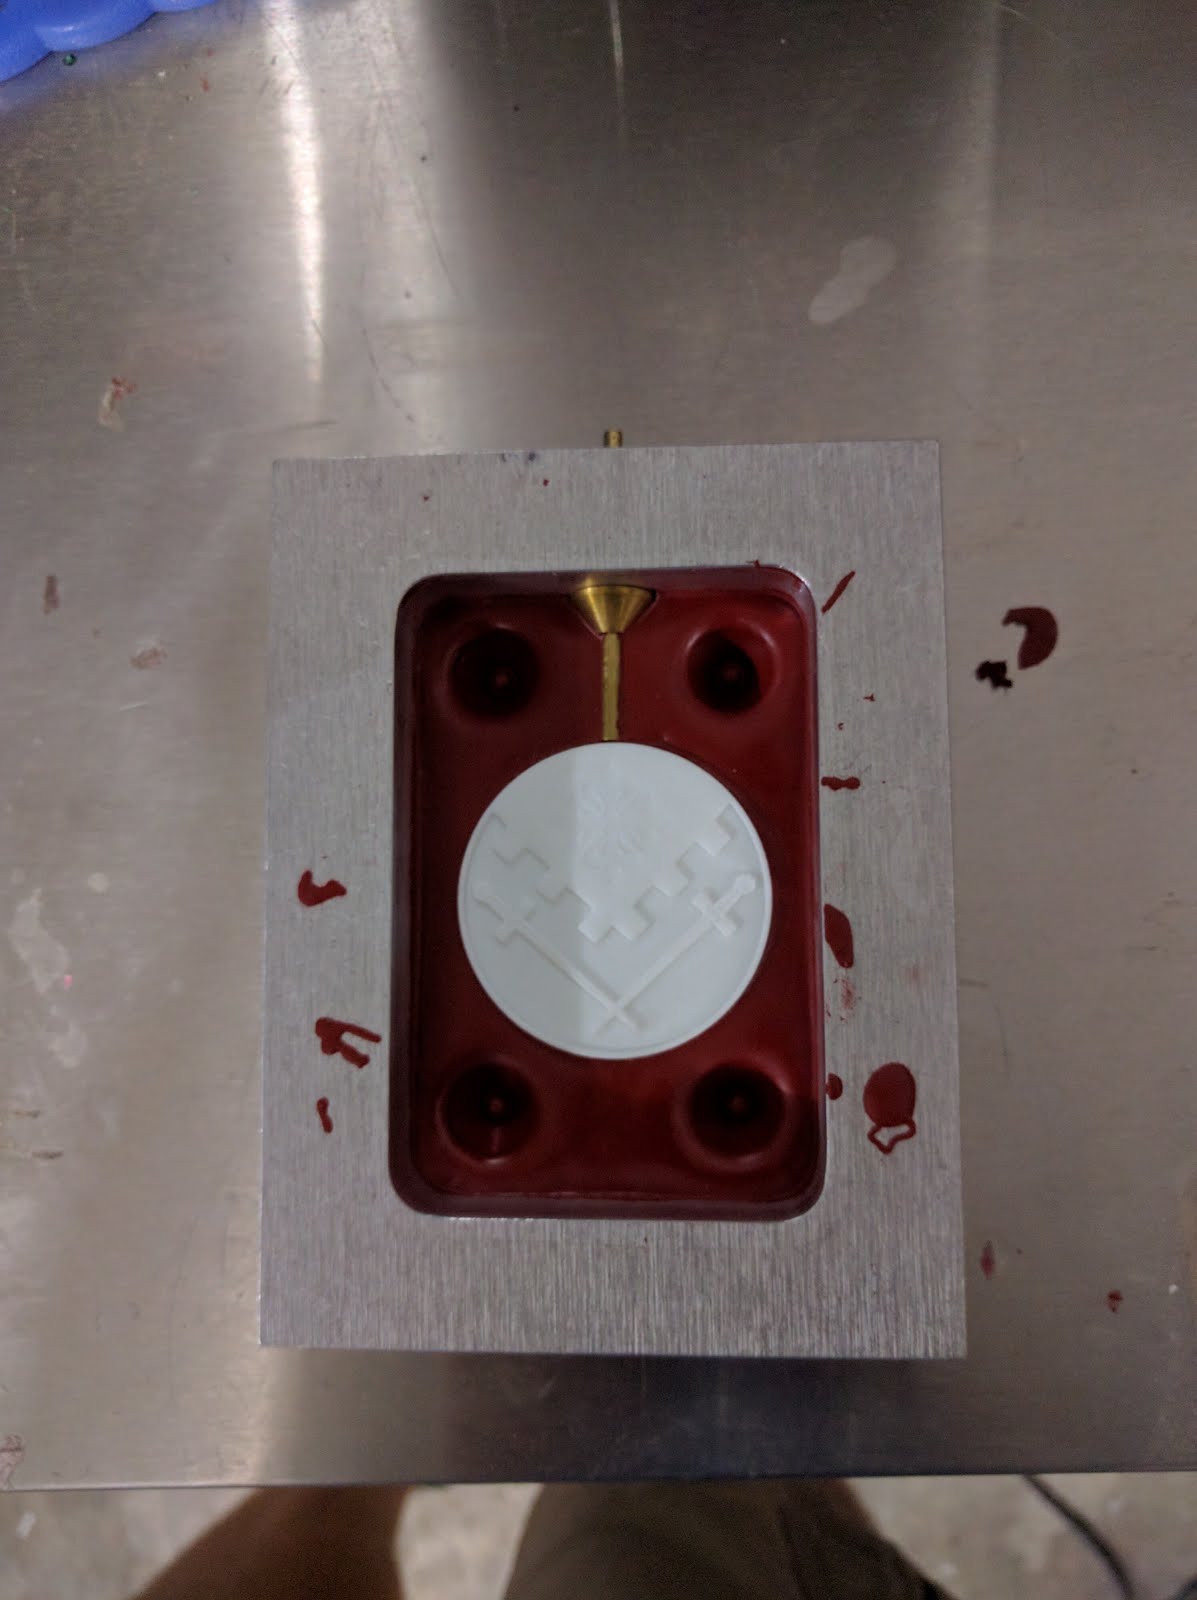
Then pop out the original model...
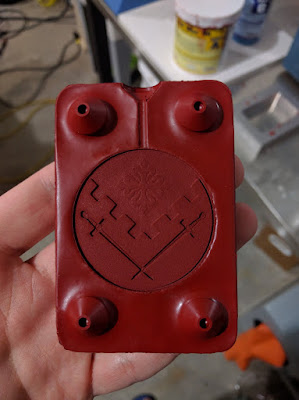

And check the mold to make sure the details came out OK. One area I generally have to trim is at the top where the sprue meets the main model. You don't want any silicone sticking up in that area, because that causes a weak point in the injected model. That usually leads to the model jumping off the tree right before you pour the investment for the main mold. Which is a little annoying.
Anyways, once the inside of the mold is good, the last thing to do is trim up the outside and cut the top edges flush with the surface. This way, when we clamp it between boards later, it gets even pressure across the whole mold.


At this point, all the silicone in the mixing cup has also cured, which makes cleanup really satisfying.
 |
| Almost as satisfying as peeling film off new electronics. |
Wax Injection
Once we've got molds made for all the stuff we want to cast, we can move on to making the wax models.Materials

Again, going roughly from left to right:
- Injection wax. There are several different kinds available with different properties like flexibility, how easy it is to carve, how well it flows, and memory (if you bend it, does it go back to how it was). Which you use depends on how big and detailed your model is, and if you need to do any adjustments after injecting the wax. This is a high flexibility wax, but really I could use a less flexible, more carvable wax since I'm just doing a basic two piece mold. Different waxes also have different recommended temperatures and pressures for injection.
- Clamps. These are used to provide a consistent pressure to the mold for every injection instead of squeezing by hand. This way you don't get models of varying thickness if you squeeze harder on one model than another. Also, if you have multiple clamps, boards, and models; you can set the whole assembly aside to cool while you inject another model.
- Boards. These are pieces of scrap 1" thick board. They go between the clamps and the mold to spread the force evenly across the whole mold.
- The mold. With silicone, you don't need a mold release spray, but an occasional blast of the universal mold release from before can help.
- More scrap 1" board, in this case to protect my pretty workbench from wax. You'll get occasional dribbles, and I've had the nozzle get stuck in once or twice and spray wax out for a second before resealing.
- The wax injection pot. There are plenty of options, from analog to digital, and from a basic direct pump to inject wax to having a hookup for an air compressor to blow it in. Mine has a digital heater and a hand pump on top to pressurize the pot, no air compressor needed.
Process
About an hour before getting started, you need to turn on the heater on the wax pot. It takes a while for the wax to melt, and even at an hour you still will probably have a hockey puck of unmelted wax in the middle. It's not ideal for consistency, but I haven't had any real issues yet.
When it comes time to inject, pressurize the pot with whatever method it uses (if any), then clamp the mold like so:


Put the gate at the top of the mold against the wax injection nozzle and push in.


You'll want to hold this for several seconds as the mold fills up. While I could probably get away with less, I usually count to ten. During this, you'll want to make sure wax doesn't start flowing out around the edges of the model. This can happen if the pressure is too high or you aren't clamping with enough force.
After ten seconds, set the mold aside for a few minutes to let the wax cool. If you have several molds set up, you can have a constant rotation going to churn out a lot of models quickly. Otherwise, you have time to go clean up other parts of the shop.
After the wax is cool, unclamp the mold and carefully crack it open. There are a few things that can go wrong at this point. If the mold didn't fill all the way, you might have your temperature or pressure too low. If you have a lot of flashing where the molds meet, you might have too high of a pressure or a defect in the mold. Ideally, it will look something like this:
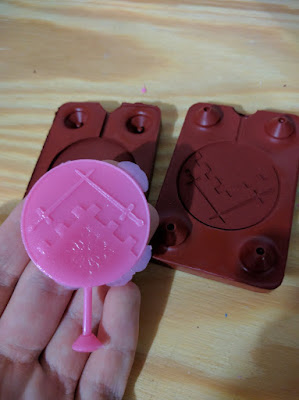

While there's a little flashing, that amount is really easy to peel off while the model is still warm.
After going through this process a few times, you will eventually end up with a nice little library of molds, making it easy to produce models on demand.

Coming soon: how to turn these into metal.